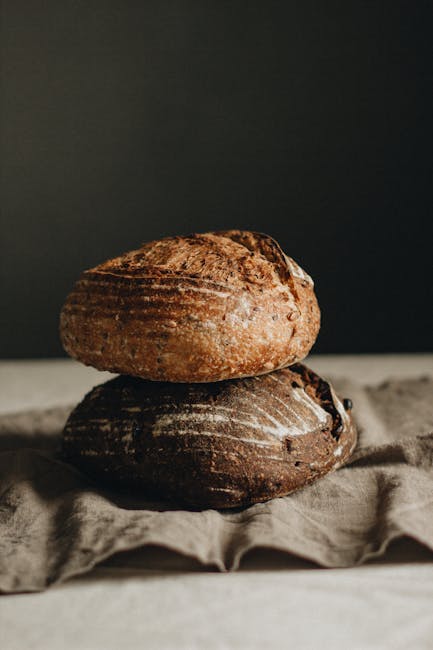
How to Create Artisan Bread with Your Thermomix
Artisan bread has become a cherished staple in many households due to its rich flavor, crunchy crust, and delightful texture. But many people believe that crafting such bread requires a professional touch or expensive equipment. Enter the Thermomix—a powerful kitchen appliance that can simplify the bread-making process while delivering exceptional results.
In this comprehensive guide, we’ll explore how to create artisan bread with your Thermomix. We’ll cover everything from selecting the right ingredients to the nuances of kneading and baking, ensuring you achieve bakery-quality bread right at home.
The Rise of Artisan Bread: A Brief Overview
Over the past decade, the demand for artisan bread has soared. According to market research, the global artisan bakery market is expected to grow by 4.8% annually, reaching a valuation of $146 billion by 2025. This growth is fueled by consumers’ increasing preference for authentic, high-quality food products that are made with traditional methods and natural ingredients.
Artisan bread distinguishes itself from mass-produced counterparts by its hand-crafted nature, slower fermentation process, and the use of minimal ingredients. It’s not just bread; it’s a culinary experience.
Why Use a Thermomix for Artisan Bread?
The Thermomix is a versatile kitchen tool that combines the functions of over 12 appliances into one. It is particularly adept at bread-making due to its ability to precisely control temperature and knead dough efficiently. Here are a few reasons why it’s perfect for artisan bread:
- Consistency: The Thermomix ensures even mixing and kneading, leading to consistent results every time.
- Precision: With its temperature control, you can manage fermentation and proofing processes more effectively.
- Time-saving: Automating parts of the bread-making process frees up time for other kitchen tasks.
Step-by-Step Guide to Making Artisan Bread Using a Thermomix
1. Gather Your Ingredients
Artisan bread relies on simple, high-quality ingredients. Here’s what you’ll need:
- 500g strong bread flour
- 350ml lukewarm water
- 10g salt
- 7g active dry yeast
Optional add-ins include herbs, seeds, or nuts for a personalized touch.
2. Prepare Your Thermomix
Before you begin, ensure your Thermomix is clean and ready for use. Set it to the desired settings for kneading and temperature control.
3. Mixing and Kneading
Start by adding the water and yeast to the Thermomix bowl. Set the machine to 37°C and stir for 2 minutes to activate the yeast. Add the flour and salt, then set the Thermomix to the kneading function for 5 minutes. The dough should be smooth and elastic.
4. First Rise
Transfer the dough to a lightly oiled bowl and cover it with a damp cloth. Let it rise in a warm place for about 1 to 1.5 hours, or until it has doubled in size. This step is crucial as it develops the bread’s flavor and texture.
5. Shaping the Dough
Once risen, gently punch down the dough to release air. Turn it onto a floured surface and shape it into a loaf or boule. Be careful not to overwork the dough.
6. Second Rise
Place the shaped dough onto a baking sheet lined with parchment paper. Cover it and let it rise for another 30 to 45 minutes. This second rise allows the dough to relax and expand further.
7. Baking
Preheat your oven to 230°C (450°F) with a baking stone or a heavy-duty tray inside. Once hot, place the loaf onto the stone or tray. To create steam, add a small tray of water at the bottom of the oven. Bake for 25 to 30 minutes or until the crust is golden and sounds hollow when tapped.
Tips for Perfect Artisan Bread
Creating artisan bread is an art, and here are some expert tips to enhance your bread-making journey:
- Use a digital scale: Accurate measurements ensure consistent results.
- Experiment with hydration: A wetter dough can yield a more open crumb structure.
- Practice patience: Longer fermentation times improve flavor and texture.
Common Mistakes to Avoid
Even seasoned bakers can make mistakes. Here are a few common pitfalls to watch out for:
- Over-kneading: This can lead to dense bread with a tough texture.
- Insufficient rising time: Rushing the process can prevent the dough from developing properly.
- Not preheating the oven: A hot oven is essential for achieving a crisp crust.
Conclusion: Enjoying Your Artisan Creation
Creating artisan bread with your Thermomix is a rewarding experience that combines traditional techniques with modern convenience. By following these steps and tips, you can produce bread that rivals that of professional bakers. Enjoy your homemade artisan bread with your favorite toppings, or simply savor it plain to appreciate its full flavor.
Remember, practice makes perfect. Each batch of bread will teach you something new, refining your skills and bringing you one step closer to bread-making mastery.
Happy baking!
Stuck Food in Your Thermomix Blade – ThermoBrush® The easy way to Clean Your Blade

